Getting Started with Incremental RemNote
Welcome to Incremental RemNote! This guide will walk you through the basics of making Rems incremental, reviewing them, and managing your learning workflow.
What is Incremental Learning?
Incremental learning transforms how you acquire knowledge. Instead of reading a book from cover to cover or watching a full lecture, you break content into smaller pieces and review them over time—interleaved with flashcards and other material.
Key Benefits:
- Process 1000+ sources in parallel without losing track
- Prioritize ruthlessly to focus on what matters most
- Build lasting knowledge by converting passive reading into active flashcards
For a deeper understanding, see What is Incrementalism?.
Installation
- Open the RemNote Plugin Store
- Search for "Incremental RemNote"
- Click Install
The Incremental RemNote Panel
Once installed, the plugin adds a small Incremental RemNote 🌐 panel at the bottom of the left sidebar. It is the one fixed place to reach the plugin from, and where the onboarding tips live.
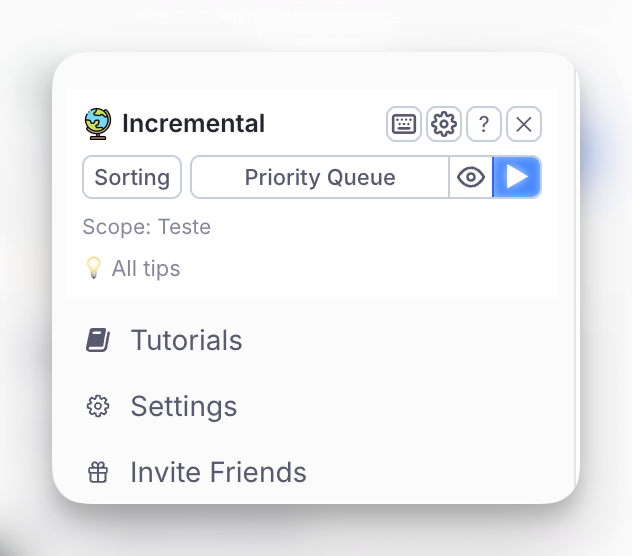
In the header:
| Control | What it does |
|---|---|
| ⌨ | Opens the Keyboard Shortcuts page |
| ⚙ | Opens the plugin's settings popup — every setting the plugin owns, grouped |
| ? | Opens this documentation, at the home page |
| ✕ | Hides the panel for this session — it is back next time you open RemNote. To bring it back sooner, run the Show Incremental RemNote Panel command |
Action buttons:
- Sorting — the flashcard/incremental mix and randomness for your queue.
- Priority Queue — three actions on the Priority Queue, grouped into one control:
| Button | What it does |
|---|---|
| Priority Queue | Opens the Priority Queue popup with the document you currently have open offered as the scope — the scope it will use is named under the button — and the whole knowledge base as the alternative |
| 👁 | Opens the Priority Review Queue Rem — every Priority Queue document is tagged with it, so its references are the list of them. Go there to practise one from your phone |
| ▶ | Learn (Cmd/Ctrl+L) — the plugin's main action. Opens the queue on the full-KB Priority Queue, building the document first if there is none yet. Shift- or Cmd/Ctrl-click practises the scope named under the button instead; if that scope has no queue yet, the popup opens with it already filled in |
The 👁 button says so if you have no review documents yet: the tag is created by the first one.
The collapsed panel
Click the 🌐 globe in the panel header to collapse the panel to a single row of icons. Click the globe again to expand it. Useful when you keep the left sidebar narrow, or when you would rather give the room to your documents.
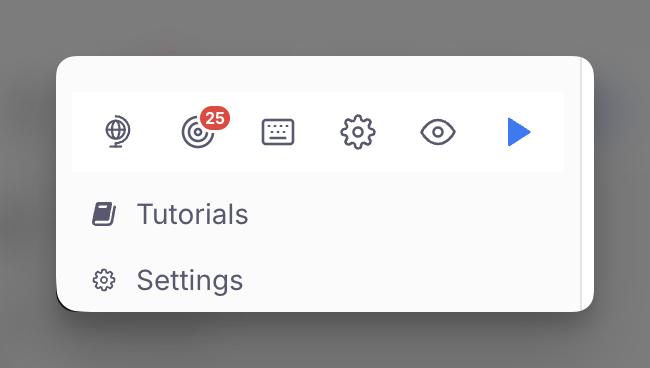
| Icon | What it does |
|---|---|
| 🌐 | Expands the panel again. A blue dot on it means a tip is waiting |
| 🎯 | Opens the Mastery Drill, with the number of cards ready to drill on a badge. Only appears when the drill is on and at least 10 cards are ready |
| ⌨ | Opens the Keyboard Shortcuts page |
| ⚙ | Opens the plugin's settings popup |
| 👁 | Opens the Priority Review Queue Rem |
| ▶ | Learn, exactly as in the expanded panel — including Shift/Cmd-click for the current scope |
The choice is remembered per device and survives a restart, so a laptop where you keep the sidebar narrow can stay collapsed while your desktop stays expanded. There is no setting for it: the globe is the setting.
What is not on the row. Sorting, the Priority Queue button and the scope line have no icon here on purpose — at a sidebar narrow enough to want a collapsed panel, ten icons would wrap into the stack of rows that collapsing is meant to get rid of. Expand the panel to reach them. The one you would otherwise miss, the scoped queue, is covered by Shift/Cmd-clicking ▶.
The Mastery Drill notification stands down. While the panel is collapsed, the drill does not appear as its own card in the sidebar — the 🎯 icon carries it, with the same count.
Tips pause rather than pass. A tip is still drawn while collapsed, and the globe carries a blue dot when one is waiting, but it is not recorded as shown. Days spent collapsed therefore do not cycle the pile past tips you never had a chance to read; expand the panel and the tip is there. See Tips below.
When ▶ starts pulsing
After you open RemNote, the plugin keeps working in the background for a while — up to a few minutes on a large knowledge base. The ▶ button stays still until all of it has finished, then starts pulsing:
- the card priority cache and the IncRem cache
- the deferred pre-tagging of flashcards that have no priority yet
- the cooling scan for the Card Shield
- the CardPriority hidden-slot check
- the priority band colours
- the full-KB Priority Queue refresh, which runs once the caches and the cooling scan are done
Hover ▶ to see what is still running. If it never starts pulsing, one of these failed or took too long: the tooltip names it, and the console has the details.
In Light Mode, or with flashcard prioritisation off, the card cache, pre-tagging and cooling scan do not run, so ▶ waits only for the rest; the Priority Queue refresh does not run in Light Mode or with its setting off. You can practise at any time — the pulse only tells you the plugin is fully ready.
Tips
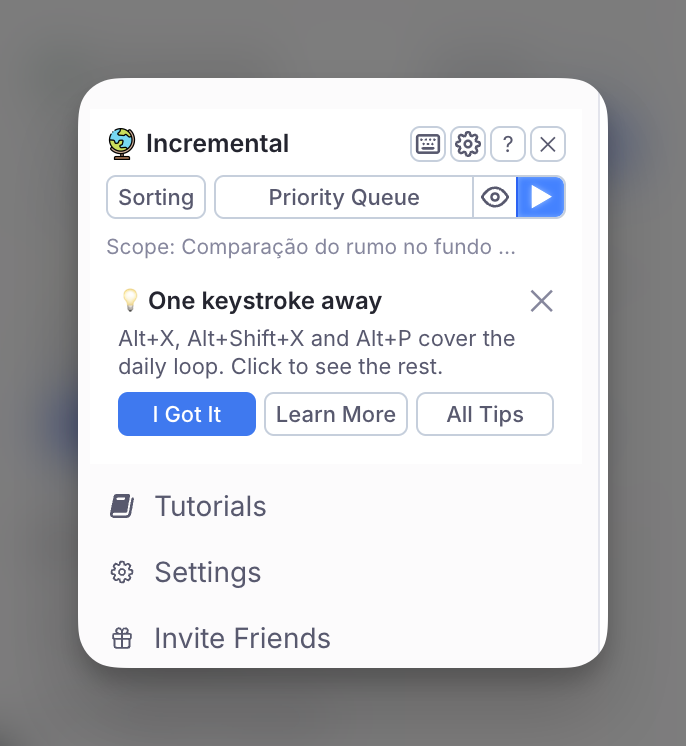
The panel shows one tip per session. Answer it and the tip area is done until the next time you open RemNote — it will not hand you another one, and moving around RemNote will not swap it for a different one either. Each tip has four buttons:
- I Got It — you know this one. It is never shown again. This is remembered per knowledge base and syncs across your devices.
- ✕ — not now. The tip stays in the pile and can resurface later.
- Learn More — opens the documentation section for the feature the tip is about. Tips that are habits rather than features have no such button.
- All Tips — opens the full list. See All Tips below.
I Got It and ✕ both end the tip area for the session, and the panel then goes quiet for two hours — so a reload does not immediately produce another tip. Both the quiet period and the one-per-session limit are per knowledge base: answering a tip in one knowledge base does not silence the panel in another.
A tip you have not retired will come back on another day — that is what ✕ means. But tips are offered in rotation, least recently seen first, so every other tip still in the pile gets its turn before any one of them repeats. This matters most near the end: with two or three tips left, a random draw would keep landing on the same one.
Tips come in two groups, and the second is not offered until the first is done: Basics teaches the daily loop, Utilities waits until you have it. So a brand-new user's first tip is about Alt+X, not about cycling text case.
When you have answered I Got It to every tip, the tip area disappears for good and the panel keeps a small 💡 All tips link.
All Tips
All Tips opens the whole pile in one popup — useful for checking what you have already been told, and for reading ahead without waiting a session per tip.
- Acknowledged first, most recently answered at the top, each with the date you pressed I Got It. Tips you retired before the plugin started recording dates say date not recorded.
- Not yet acknowledged below, in the order the panel will offer them.
Each row has its own Learn More, and every tip you have not retired has its own I Got It — so you can clear tips you already know without waiting for the panel to offer them one at a time. As in the panel, I Got It here means the tip is never shown again.
The popup is keyboard-driven: ↑/↓ move (Home/End jump to either end), Enter acknowledges the selected tip, Space opens its documentation, Esc closes.
Starting over
There is no undo for I Got It. If you want the whole pile back, the Debug popup has a Reset acknowledgements button under Onboarding Tips State, which clears every acknowledgement for the current knowledge base.
Making a Rem Incremental
The first step is to convert a Rem, PDF, or website into an "Incremental Rem" so it will appear in your queue.
Method 1: Slash Command
- Focus on any Rem in the editor
- Type
/Make Incremental (Extract)and select the command - The Rem is now tagged with the
Incrementalpowerup
Method 2: Keyboard Shortcut
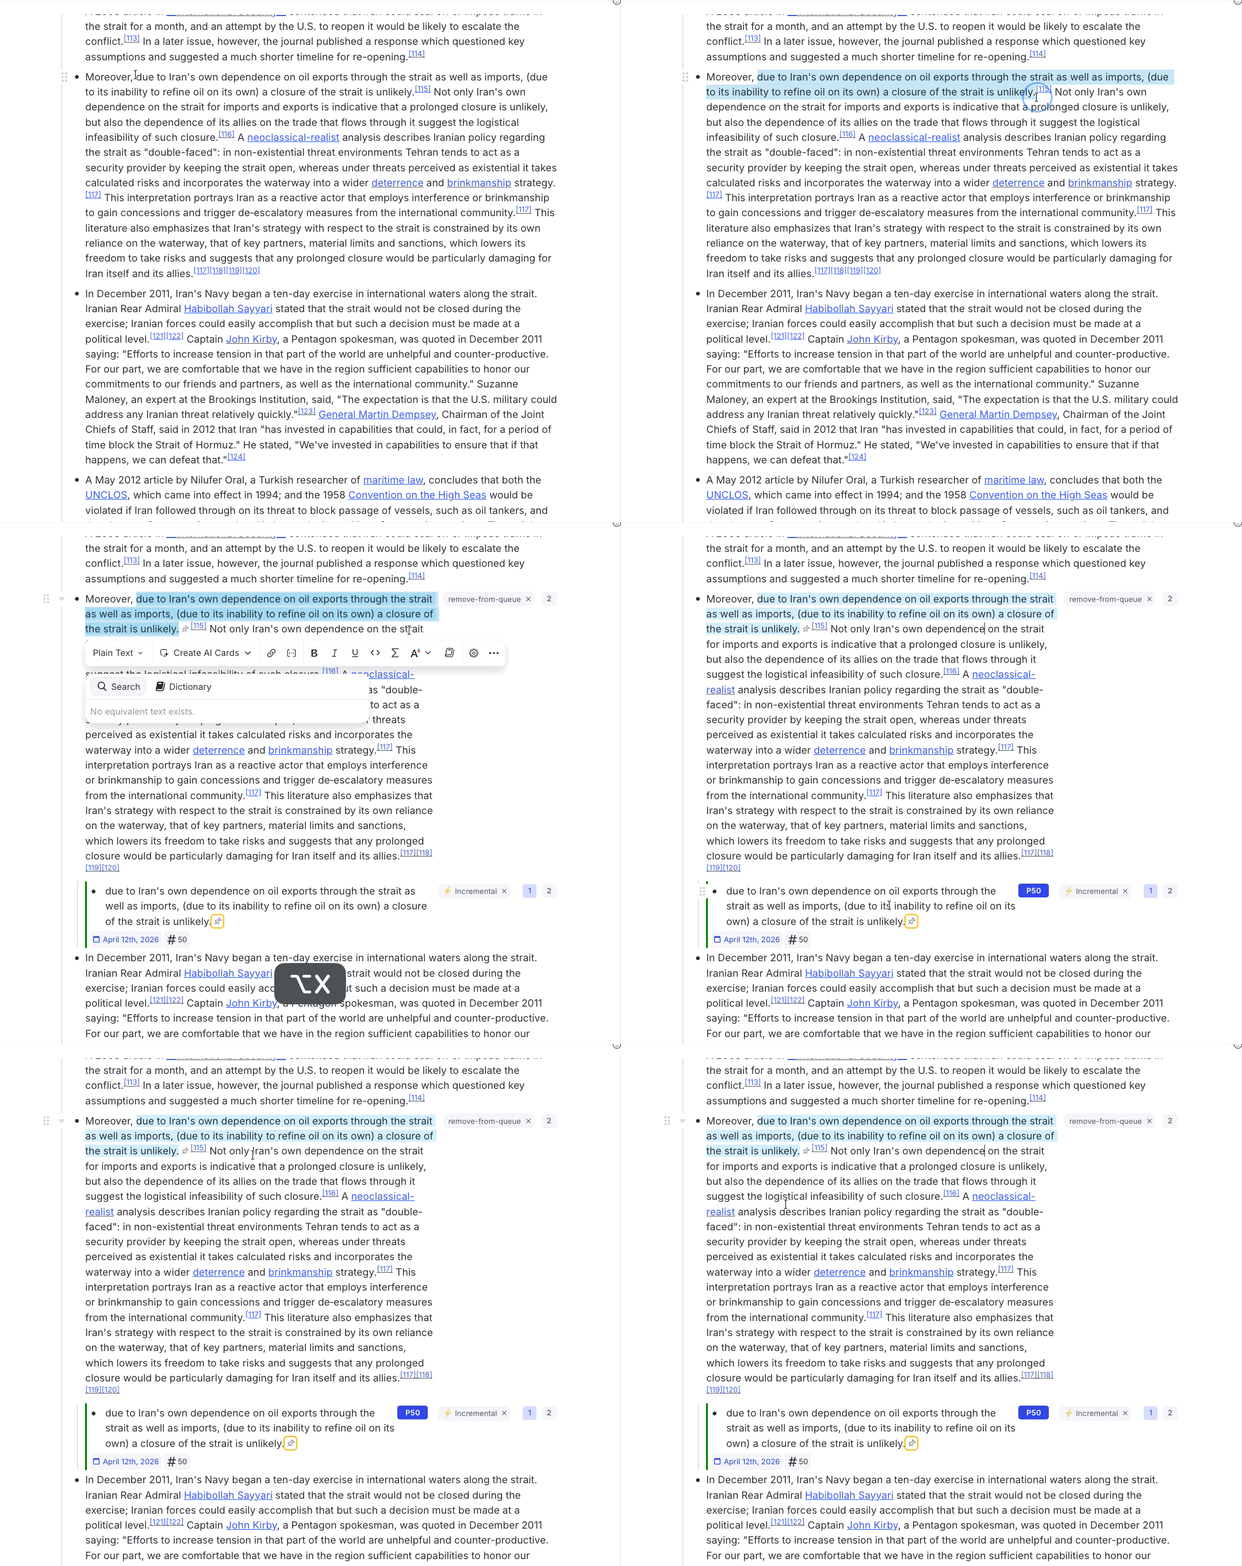
- Alt+X (or Opt+X on Mac) — Makes the focused Rem incremental. If text is selected, it creates a new Reviewing-Items-in-the-Editor#extracting-text from that selection.
- Alt+Shift+X — Makes the Rem incremental AND opens the priority popup. Supports Reviewing-Items-in-the-Editor#extracting-text from selections.
Method 3: Document Menu
- Click the ⋮ (three dots) menu at the top-right of any document
- Select "Toggle Incremental Rem"
- The priority popup will open automatically
What Happens When You Make a Rem Incremental?
- The Rem receives the
Incrementalpowerup tag - A "Made Incremental" event is recorded in the repetition history, stamped with the priority and the interval the Rem started with
- The Rem is scheduled for its first review (based on your Initial Interval setting, default: 1 day)
- The Rem will now appear in your queue, interleaved with flashcards
Reviewing Incremental Rems in the Queue
When you enter the queue, your Incremental Rems appear alongside your flashcards. The Answer Buttons bar at the bottom provides your main actions:
| Button | Shortcut | What it does |
|---|---|---|
| Next | — | Marks item as reviewed, schedules next repetition |
| Reschedule | Ctrl+J | Manually set the next review date |
| Dismiss | — | Finishes the item, removes Incremental tag |
| Change Priority | Alt+P | Opens priority popup |
| Review & Open | — | Reviews the item AND opens it in the editor |
The "One Memory, One Action" Principle
Before clicking "Next," always perform at least one productive action:
- Extract a key sentence as a new Incremental Rem
- Create a flashcard from important information
- Rephrase a confusing passage
- Highlight essential content
Avoid "futile reviews" where you just glance at content without engaging.
For more details, see Reviewing Items in the Queue.
Dismissing an Incremental Rem (Dismiss Button)
When you've fully processed an item and extracted all valuable knowledge:
- Click the "Dismiss" button in the queue, OR
- Manually remove the
Incrementaltag in the editor
What Happens When You Dismiss?
- The Rem's complete repetition history is preserved in a
Dismissedpowerup - The
Incrementaltag is removed - A yellow left border appears in the editor to indicate the Rem has preserved history
- The item no longer appears in your queue
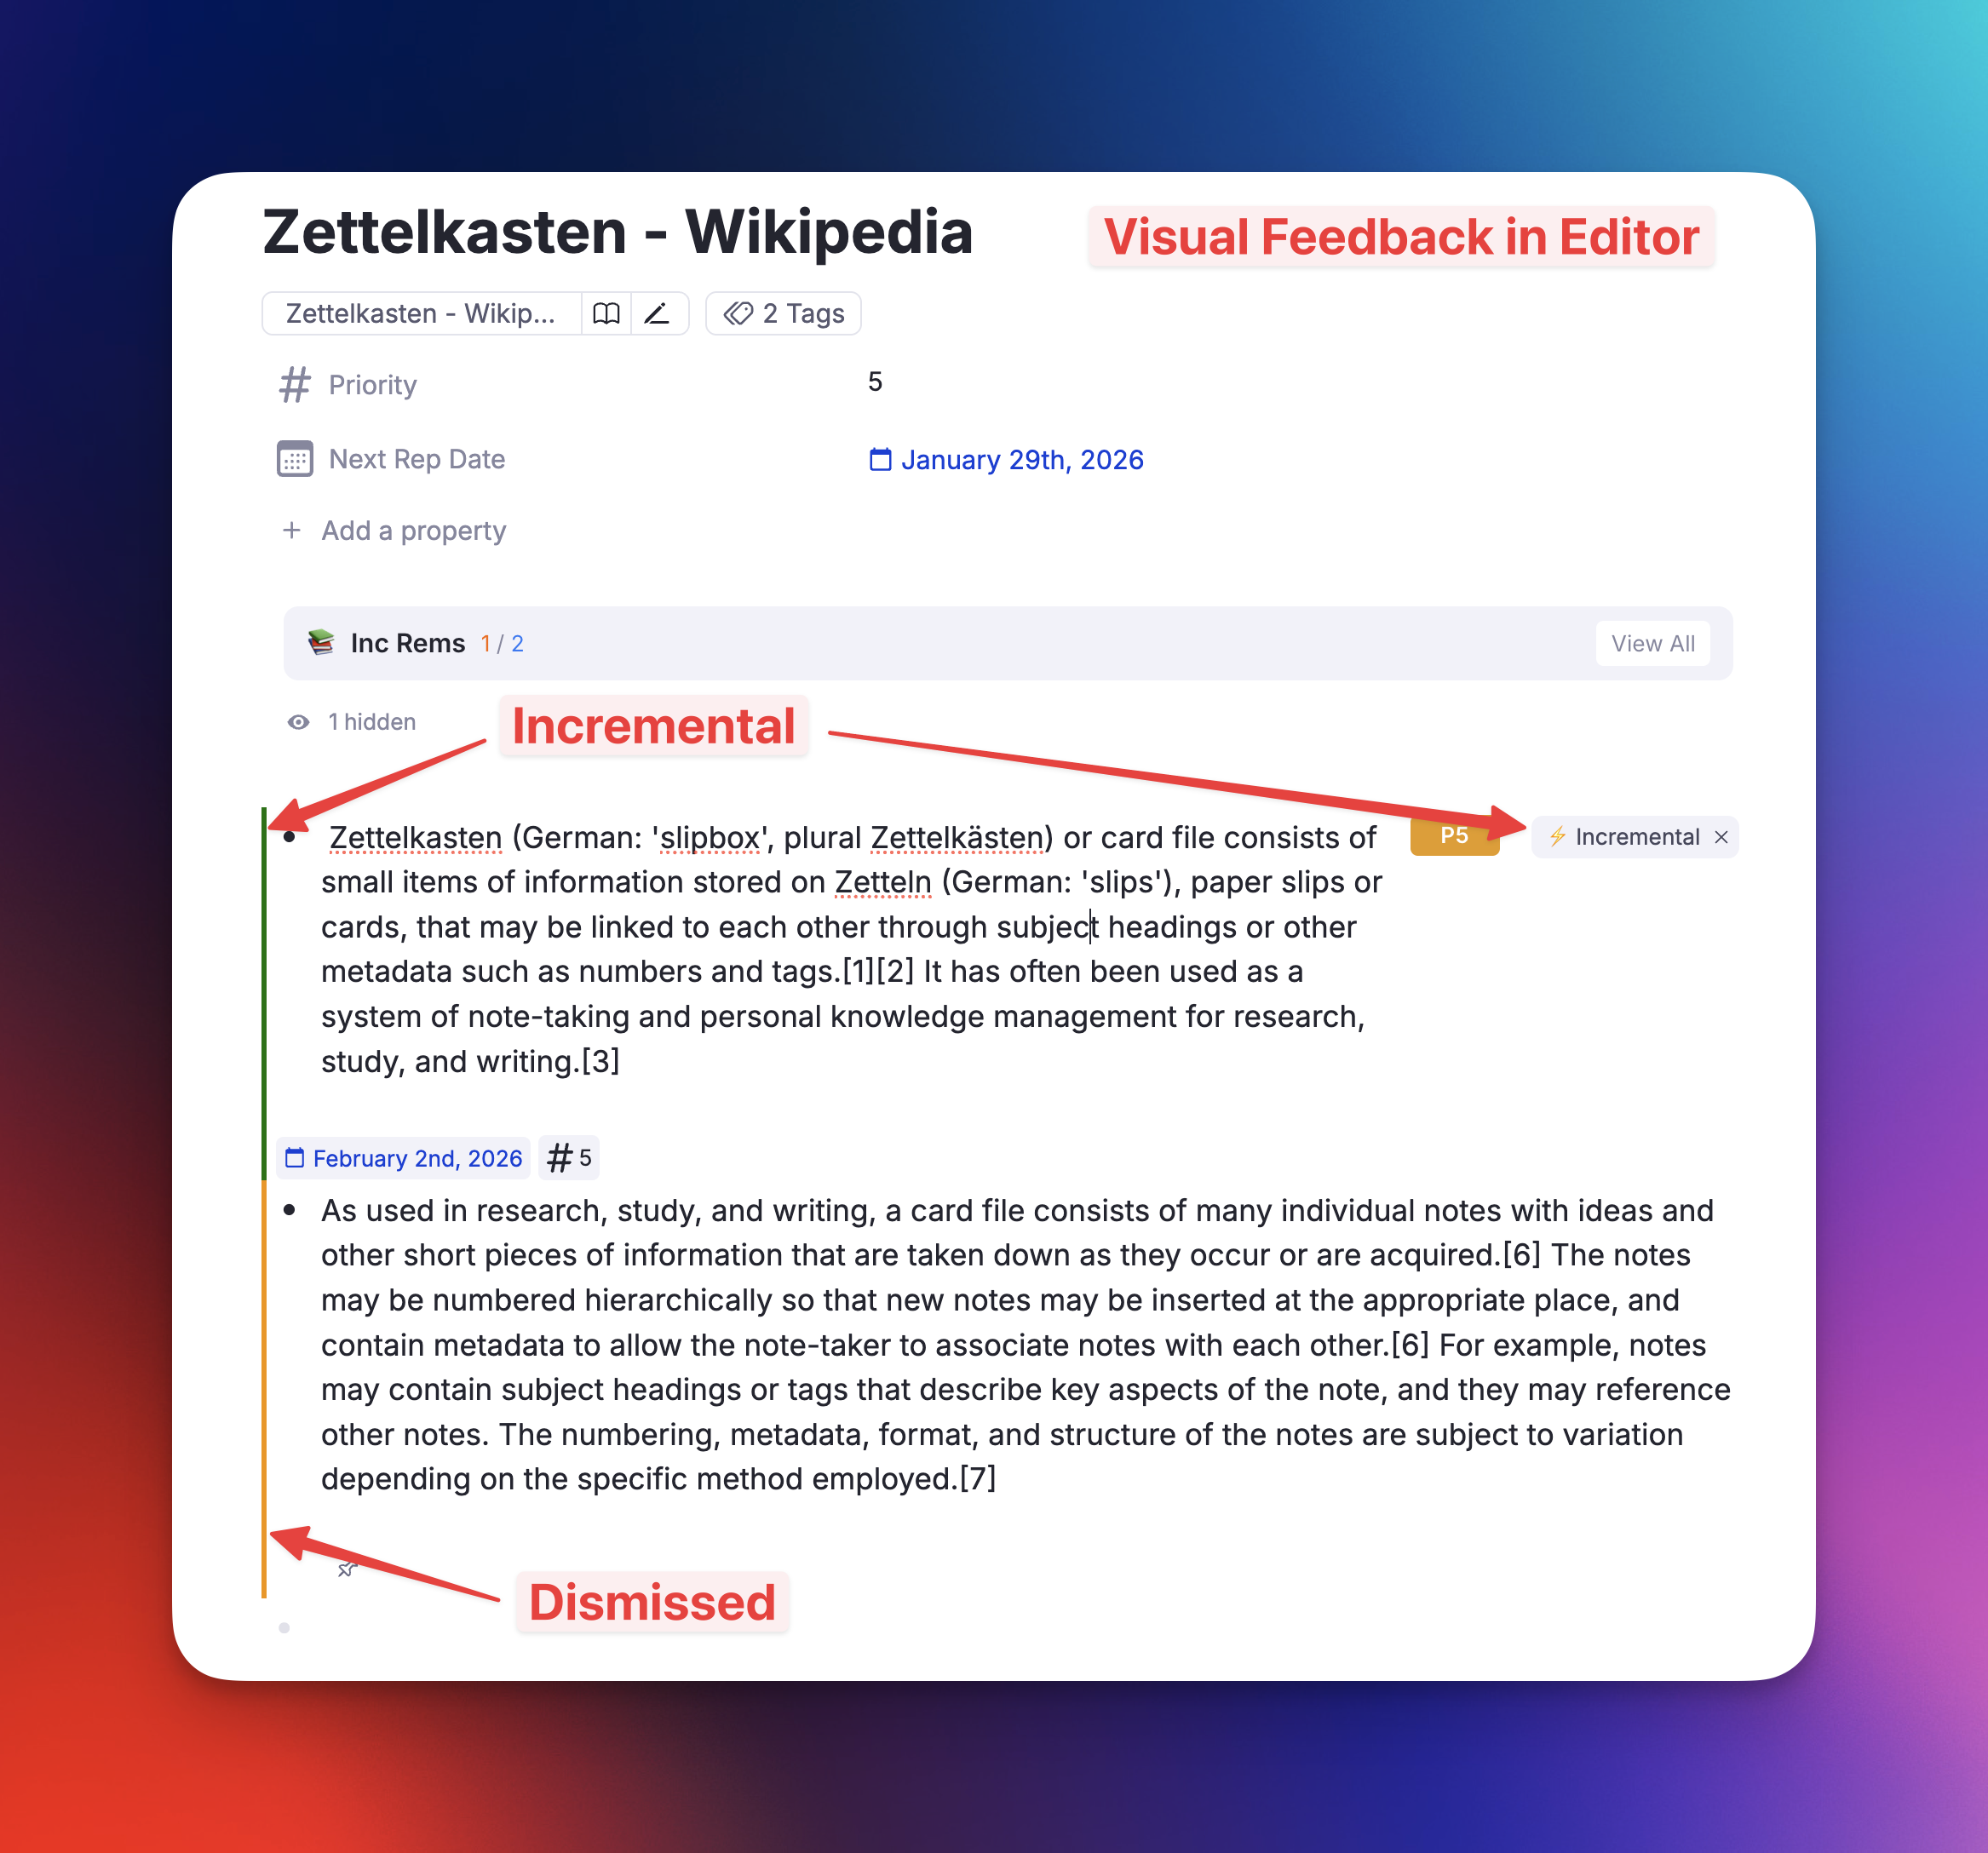
Visual Settings:
- Show Yellow Left Border for Dismissed Rems — Toggle the visual indicator (default: on)
- Hide Dismissed Tag in Editor — Reduce clutter by hiding the tag (default: on)
Re-activating a Dismissed Rem
If you want to review a dismissed item again:
- Make the Rem incremental again using Alt+X or the slash command
- The old history is automatically restored and merged
- A "Made Incremental" marker is added to distinguish the new learning session
This allows you to:
- See your complete learning journey across multiple sessions
- Resume where you left off with preserved context
- Analyze your long-term engagement with material
Setting Priorities
Priority is crucial for managing information overload. Lower numbers = higher priority.
| Priority | Meaning |
|---|---|
| 0-20 | Critical, must review frequently |
| 20-50 | Important, regular review |
| 50-80 | Moderate, occasional review |
| 80-100 | Low priority, review when time permits |
Quick Methods
- Alt+P — Full priority popup with analytics
- Ctrl+Opt+P — Light priority popup (faster)
- Ctrl+Opt+Up/Down — Quick Priority Change: Adjust priority instantly without opening any popup
For comprehensive details, see Prioritization & Sorting.
Next Steps
Now that you understand the basics, explore these topics:
- Repetition History & Statistics — Read an item's review log, the aggregated tree view, and what each event marker means
- Prioritization & Sorting — Master the priority system
- Reviewing Items in the Queue — Deep dive into the queue workflow
- Create Incremental Rem from PDF Highlights — Extract from PDFs, and move an Incremental Rem's data to its parent when it landed on the wrong one
- Keyboard Shortcuts — Speed up your workflow
- Changelog — See the latest features
Happy Incremental Learning! 🚀